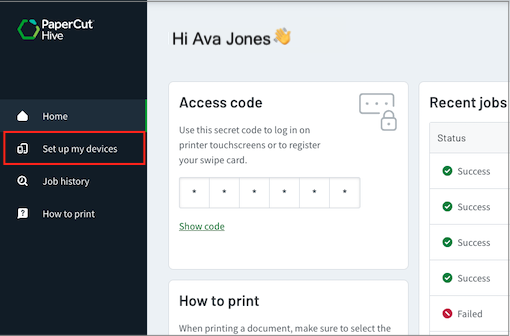
The User Portal is PaperCut Hive and PaperCut Pocket’s end-user web interface, and allows users to self-serve client software, get their access code, view information related to their account, and more. On this page, you’ll find more information about these features, as well as how to customize what’s displayed to your users.
What’s included in the User Portal?
Here’s a quick overview of what’s available to your end-users in the User Portal:
Feature | Description | Customization |
Access code | Allows user to look up their access code (used to release print jobs at the printer) | Always available |
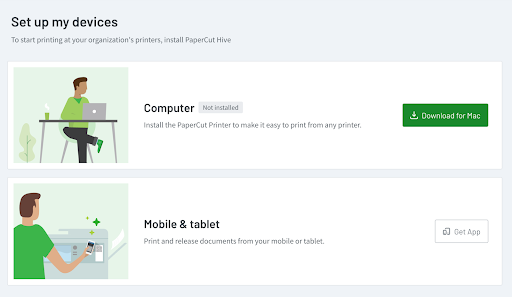
Set up my devices | Allows the user to self-serve downloading and installing the client software for computer and the app for mobile devices | One or both software options can be hidden from end-users via Easy Print & Scan > User Portal |
Learn how to print | Guides for basic printing with PaperCut Hive and PaperCut Pocket for various operating systems and release methods | Always available |
Account balance | Displays the current balance in the end-user’s account. For this feature to be available, Cost Tracking must be enabled for the organization. | Can be hidden from end-users via Reduce Waste > Cost Tracking > Settings |
Transactions | Displays up to 100 account transactions from the last 90 days. For this feature to be available, Cost Tracking must be enabled for the organization. | Can be hidden from end-users via Reduce Waste > Cost Tracking > Settings |
Setting up which software download options are displayed in the User Portal
In PaperCut Hive and PaperCut Pocket, you can choose to:
- Allow end users to manage their own client software app downloads, or
- Centrally manage client bulk deployment (e.g. with mobile device management software)
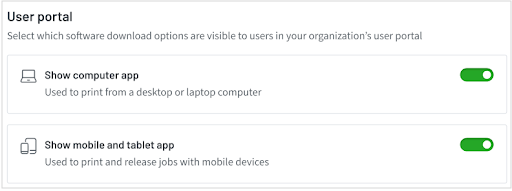
If your organization uses the User Portal , you can customize which client software app options are visible to end users in the User Portal’s Set up my devices area.


In the admin console, go to Easy Print & Scan > User Portal settings. Turn on (green) the apps you want to display. If you hide all the apps, the Set up my devices menu option is removed from the menu.

About Transactions
The Transactions feature allows end-users to review all changes to their balance. These changes can be:
- Print jobs and copy jobs with costs that are deducted from the user’s Balance.
- Manual adjustments to the user Balance made by an admin (such as adding to a user’s balance when the user notifies the admin that they’ve reached $0).
- Automatic adjustments in the user Balance made by an automation (such as a scheduled quota adding $5 per month to the user’s balance).
Transactions shows up to 100 transactions from the last 90 days. Only an admin has access to all transaction records: to download a copy of all transaction records, the admin should open the admin console and go to Reports > Transaction log, then export the CSV file.
What’s displayed to users in Transactions?
Here’s a brief overview of what is displayed to end-users in Transactions:
Column name | Description | Example values |
Date | When the transaction was settled | |
Transacted by | Shows who or what caused the balance to change (a job, a manual adjustment by an admin, or an automatic adjustment by a scheduled automation) |
|
Transaction type | Shows type of transactions such as:
| |
System note | These are notes from the system, not entered manually by a person. Currently shows the name of any quota scheduled automation (more options will be available in the future). |
|
Comment | Displays any transaction comment optionally entered by the admin. Where a comment is added to a scheduled quota during setup, it will appear each time the quota automatically runs. |
|
Amount | The amount of the transaction. Can be positive or negative, according to the transaction type. | |
Balance | The resulting balance after the transaction. |


Comments